What is an XML Sitemap?
An XML Sitemap is a file specifically designed to assist search engines, such as Google, in indexing websites. In contrast to a regular HTML sitemap intended for visitors, an XML Sitemap is usually not published on the website and is exclusively meant for search engines.
The XML file contains a detailed overview of all the URLs on the website. This enables search engines to crawl the website more quickly and efficiently, improving their understanding of the relevance of the content. Instead of relying on discovering pages through links on the website, a search engine can simply consult the XML Sitemap to obtain a comprehensive overview of all available pages.
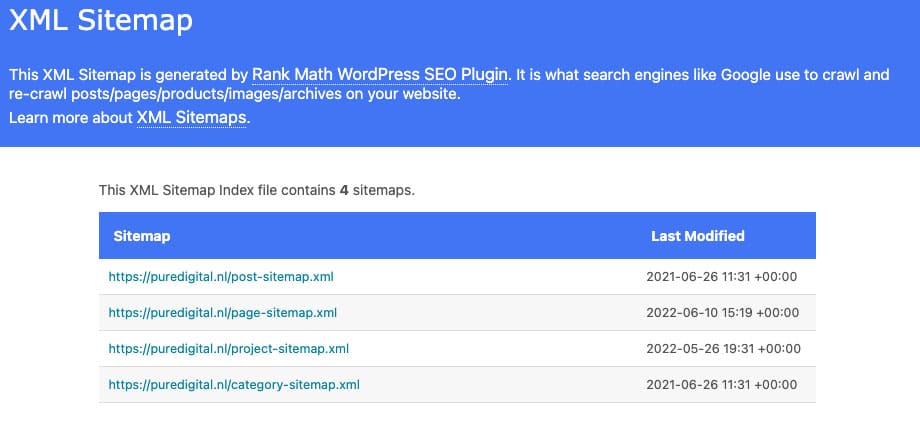
How Does a Sitemap Look Like?
For PureDigital, we also have an XML Sitemap, which can be found at:

Why use an XML Sitemap?
The use of an XML Sitemap is crucial for an effective SEO strategy. An XML Sitemap offers various benefits that contribute to better visibility and indexing of your website by search engines such as Google.
The XML Sitemap acts as a map for crawlers. It provides search engines with insight into the complete link structure of your website. This allows search engines to easily discover and crawl all linked pages. It is crucial that search engines have access to all the important pages on your website, and an XML Sitemap ensures that this is possible.
In short, the XML Sitemap contributes to the indexing process of new and existing pages. When you don’t use an XML Sitemap, the crawler is entirely dependent on the internal links on the website. If it skips pages in this process, it might result in new pages being indexed slowly or not at all.
Our tips for creating an XML Sitemap:
To ensure that your XML Sitemap functions optimally and is effective, it is important to follow best practices as defined by the sitemaps protocol. While many aspects are important, some best practices are often overlooked. Let’s take a look at these important recommendations:

Limits for Sitemap Size: Keep in mind that a single sitemap should not exceed 50 MB (uncompressed) or contain more than 50,000 URLs. If your sitemap exceeds these limits, it is necessary to split it into multiple sitemaps. You can create a sitemap index file that lists all individual sitemaps and submit this index file to Google. This way, you can track the search performance of each individual sitemap via Search Console.This way, you can track the search performance of each individual sitemap via Search Console.

Encoding and Location of Sitemap Files: Ensure that your sitemap file is UTF-8 encoded. You have the flexibility to host your sitemaps anywhere on your website. However, unless you submit your sitemap through Search Console, it only influences the URLs within the parent directory. To ensure the sitemap encompasses all files on your site, it is recommended to place it at the root of your site.

Properties of Referenced URLs: Use fully qualified, absolute URLs in your sitemaps. Google crawls the URLs exactly as listed, so it’s important to provide the complete URL, including the protocol (e.g https://www.example.com/mypage.html) instead of using relative URLs. By including the URLs in your sitemap, you influence which URLs appear in Google search results.

Canonical URLs: Google typically displays canonical URLs in search results.
These are just a few essential best practices for XML sitemaps. For a comprehensive list, you can refer to the documentation of the sitemaps protocol.
XML Sitemap Format
The XML Sitemap format provides versatility, allowing you to provide additional information about your content, such as images, videos, news, and localized versions of your pages. By using supported Google sitemap extensions, you can enhance the representation of the structure and content of your website.
Below is a simple example of an XML Sitemap with the location of one URL:
<?xml version=”1.0″ encoding=”UTF-8″?>
<urlset xmlns=”http://www.sitemaps.org/schemas/sitemap/0.9″>
<url> <loc>https://www.example.com/foo.html</loc>
<lastmod>2022-06-04</lastmod>
</url>
</urlset>
For more complex examples and comprehensive documentation, you can refer to sitemaps.org.
Additional information regarding XML sitemaps
It’s important to note that Google <priority>- and <changefreq>- ignores the values in the sitemap. Google makes use of the < > value if it is consistent and verifiable (for example, by comparing it with the page’s last modification).
By following these best practices for XML sitemaps, you can optimize crawling and indexing, increase the visibility of your website in search results, and ensure an accurate representation of your content.
How can you create an XML Sitemap?
Once you’ve decided which URLs to include in the sitemap, you can use one of the following methods to create a sitemap, depending on the architecture and size of your website:
Having your CMS generate an XML Sitemap for you?
This is, of course, the easiest and usually the least error-prone option you have. In most cases, new URLs are added automatically, and you also have the option to choose which URLs you want to include and which ones you don’t. If you’re using a CMS like WordPress, Wix, or Blogger, there’s a good chance that your CMS has already provided a sitemap to search engines. Search for information on how to generate CMS sitemaps or how to create a sitemap if your CMS doesn’t do it automatically. For example, search for “Wix sitemap” or for Blogger, search for “Blogger RSS.”
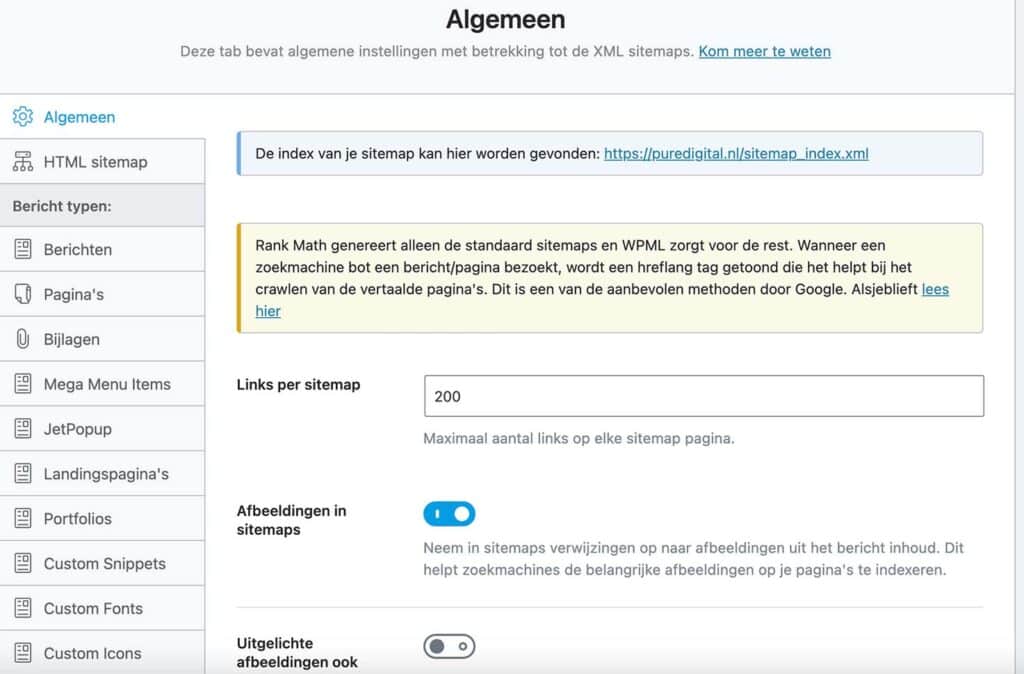
WordPress provides several helpful plugins that allow you to automatically generate an XML sitemap. Two popular options are Rank Math and Yoast SEO. Below are the steps to create an XML sitemap using these plugins:
Rank Math:

Install and activate the Rank Math plugin through the WordPress plugin dashboard.

Go to “Rank Math” in the left-hand menu of your WordPress admin dashboard and click on “General.”

Click on the “Sitemap” tab and enable the “XML Sitemap” feature.

Adjust settings if necessary, such as the frequency of automatic updates and the limit for the number of URLs in the sitemap.

Save the changes, and your XML sitemap will be automatically generated at the location “https://www.example.com/sitemap_index.xml” (replace “example.com” with your own domain).

Yoast SEO:

Install and activate the Yoast SEO plugin through the WordPress plugin dashboard.

Go to “SEO” in the left-hand menu of your WordPress admin dashboard and click on “General.”

Click on the “Features” tab and ensure that the “XML sitemaps” feature is enabled.

Go to the “Search Appearance” tab and click on the “XML sitemaps” section.

Adjust settings if necessary, and click the “Save” button.

Your XML sitemap will be automatically generated at the location “https://www.example.com/sitemap_index.xml” (replace “example.com” with your own domain).

Both Rank Math and Yoast SEO offer flexible settings allowing you to customize the XML sitemap according to your specific needs. For example, you can exclude certain page types, set priorities for specific URLs, or add additional information to the sitemap, such as images or videos.
Developing an XML Sitemap Yourself?
If you prefer not to use a WordPress plugin, for example, and would rather create an XML sitemap yourself, there are two ways to do this: using a text editor or using an online XML generator. Here are the steps for both methods:
Using a text editor:

Open a text editor such as Windows Notepad (for Windows users) or Nano (for Linux and MacOS users).

Begin by creating a new XML code.

Use the XML sitemap syntax as described in the XML Sitemap best practices.

Add the URLs you want to include in the sitemap, along with any additional information such as the last modification date.

Save the file with a .xml extension, for example, “sitemap.xml”.

Upload the XML file to the root directory of your website or to the location where your sitemap should be hosted.
With the help of an online XML generator:
- Search for an online XML generator that can generate XML sitemaps.
- There are several online tools available, but two recommended XML generators are:
- XML-Sitemaps.com: This tool provides a user-friendly interface where you can input the URLs of your website and customize various options such as priority and update frequency. After generating the sitemap, you can download the XML file and upload it to your website.
- Screaming Frog SEO Spider: Although this tool is primarily intended for crawling websites, it can also generate XML sitemaps. Install the SEO Spider software on your computer and enter your website URL. Go to “Configuration” and select “Sitemaps.” Here you can adjust the settings and generate the XML sitemap.
The robots.txt file to assist your XML Sitemap:
By using the robots.txt file, you can strengthen the XML sitemap and assist search engines in crawling and indexing your most important pages. The robots.txt file is a text file that provides instructions to search engines about which parts of your website should or should not be indexed. Here are some steps to strengthen the XML sitemap using the robots.txt file:

Identify the location of your XML sitemap: Make sure you know where your XML sitemap is located on your website. Usually, the default location is “/sitemap.xml” or “/sitemap_index.xml”, but it can also be customized or moved depending on your website settings.

Open the robots.txt file: The robots.txt file is located in the root directory of your website. Use a text editor to open the file. If you don’t have a robots.txt file yet, you can create one and upload it to the root directory of your website.

Add the location of the XML sitemap: To let search engines know where your XML sitemap is located, add the following line to your robots.txt file:
Sitemap: [URL van de XML-sitemap]

Replace “[URL van de XML-sitemap]”replace it with the full URL of your XML sitemap. For example:
Sitemap: https://www.example.com/sitemap.xml

This indicates that your XML sitemap is available at the specified URL.

Save the robots.txt file: Once you have added the rule, save the robots.txt file.

Test your robots.txt file: It’s always a good idea to test your robots.txt file to ensure it’s configured correctly. Use the “robots.txt Tester” tool in Google Search Console to check if your XML sitemap is correctly listed.

By including the location of your XML sitemap in the robots.txt file, you provide search engines with a clear indication of where they can find your sitemap. This helps in more efficiently crawling and indexing your most important pages.
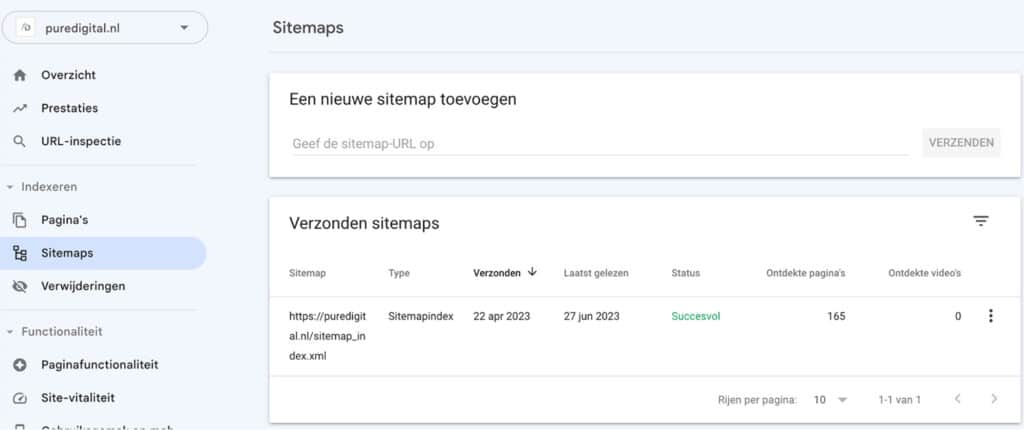
To submit your XML Sitemap to Google, follow these steps using Google Search Console:
To submit your XML Sitemap to Google Search Console, follow the steps below:
Go to the Google Search Console website (https://search.google.com/search-console) and log in with your Google account.

Navigate to the “Sitemaps” section. You can find this in the left-hand menu under the “Index” or “Indexing” section.

Click on the “Add/Test Sitemap” button at the top of the screen.

Enter the URL of your XML Sitemap into the text field. For example: https://www.example.com/sitemap.xml. Make sure to provide the full URL of the sitemap.

Click on the “Submit” button to submit your XML Sitemap.

Google Search Console will now verify and check your XML Sitemap for any issues. If any errors are detected, the system will notify you and provide suggestions to fix the issues.

Once your XML Sitemap is successfully validated, Google Search Console will start indexing the URLs in the sitemap and adding them to the search results.

It may take some time for all the URLs in your XML Sitemap to be indexed. You can track the progress in Google Search Console under the “Sitemaps” section. Here, you will see the number of indexed URLs and any errors or warnings related to your sitemap.
It’s important to remember that submitting your XML Sitemap in Google Search Console does not guarantee immediate indexing of all URLs. Google still determines which pages are relevant to index and when this happens. However, using an XML Sitemap does help expedite the indexing process and ensures that important pages of your website are discovered more quickly by search engines.
Hreflang in the XML Sitemap
The hreflang annotation is used to inform search engines about the different language and region variations of a web page. It is particularly used for websites with multilingual and multinational content. Instead of adding hundreds of lines of code to each page, webmasters can now use the rel=”alternate” hreflang=”x” link annotation in XML sitemaps to implement the hreflang annotation correctly.
The hreflang annotation can be used when you have a website with multilingual and multinational content. It is especially useful for countries with the same languages, such as German – German and German – Austrian. The hreflang annotation helps search engines, such as Google, to display the correct language and region variant of a page to users based on their preferences. It improves the user experience and the discoverability of content in different countries and languages.
To place the hreflang annotation in the XML sitemap, follow these steps:
Create an XML sitemap with the correct structure and namespaces. Add an xmlns:xhtml attribute to specify the xhtml namespace.
For each URL on your website with language or region variants, add a separate <url>-element in the XML sitemap.
Within each <url>-
<loc>: The URL of the page.
<xhtml:link>: This element is used to include the hreflang annotation for each language/region variant. Use a separate <xhtml:link>-element for each language variant, including the variant itself. Use the attributes rel=”alternate” to indicate it’s an alternate version and hreflang to specify the language code or language-country code of the variant.
Repeat these steps for each URL with language or region variants on your website.
Hier is een voorbeeld van hoe een XML-sitemap met HREF-lang annotatie eruit kan zien op basis van de gegeven informatie:
In summary, regarding the XML Sitemap:
An XML Sitemap is an essential file specifically designed to help search engines crawl and index websites. Unlike a regular HTML sitemap, which is intended for visitors, an XML Sitemap is exclusively meant for search engines. It contains a detailed overview of all URLs on the website, enabling search engines to crawl the website faster and more efficiently and better understand the relevance of the content.
Using an XML Sitemap offers several benefits for an effective SEO strategy. It acts as a roadmap for crawlers, allowing search engines to easily discover and crawl all linked pages. It ensures search engines have access to all the important pages on your website, leading to better indexing of both new and existing pages.
When creating an XML Sitemap, there are several best practices that should be followed, such as limiting the sitemap size, using the correct encoding and location of sitemap files, and using fully qualified URLs. It is also important to pay attention to canonical URLs.
There are several ways to create an XML Sitemap, depending on the architecture and size of your website. If you’re using a CMS like WordPress, you can use plugins such as Rank Math or Yoast SEO to automatically generate an XML sitemap. If you prefer to create an XML sitemap yourself, you can use a text editor or explore online XML generator tools.
Strengthening the XML sitemap using the robots.txt file is a recommended step to assist search engines in crawling and indexing your key pages.
By following the best practices for XML sitemaps and correctly implementing the XML Sitemap, you can optimize crawling and indexing, increase the visibility of your website in search results, and ensure an accurate representation of your content. Using an XML Sitemap is one of the fundamental elements of a successful SEO strategy.
Questions about SEO XML Sitemaps?
Then get in touch or download our SEO whitepaper!

